> ## Documentation Index
> Fetch the complete documentation index at: https://docs.fairytech.ai/llms.txt
> Use this file to discover all available pages before exploring further.
# FCM 설정하기
# Setup
## **1단계: 프로젝트에 Firebase 추가하기**
Google 공식 가이드를 따라 Android 프로젝트에 Firebase를 추가합니다.
* 참고: *Firebase Android 설정 가이드* ([https://firebase.google.com/docs/android/setup](https://firebase.google.com/docs/android/setup))
## 2단계: Firebase Cloud Messaging API 활성화
Google Cloud 콘솔에서 **앱과 연결된 프로젝트**를 선택한 뒤, [**Firebase Cloud Messaging API**](https://console.cloud.google.com/apis/library/fcm.googleapis.com) 를 활성화합니다
 ## 3단계: 서비스 계정 만들기
다음으로 Fairy가 FCM 토큰 등록 시 인증된 API 호출을 할 수 있도록 새 서비스 계정을 생성합니다.
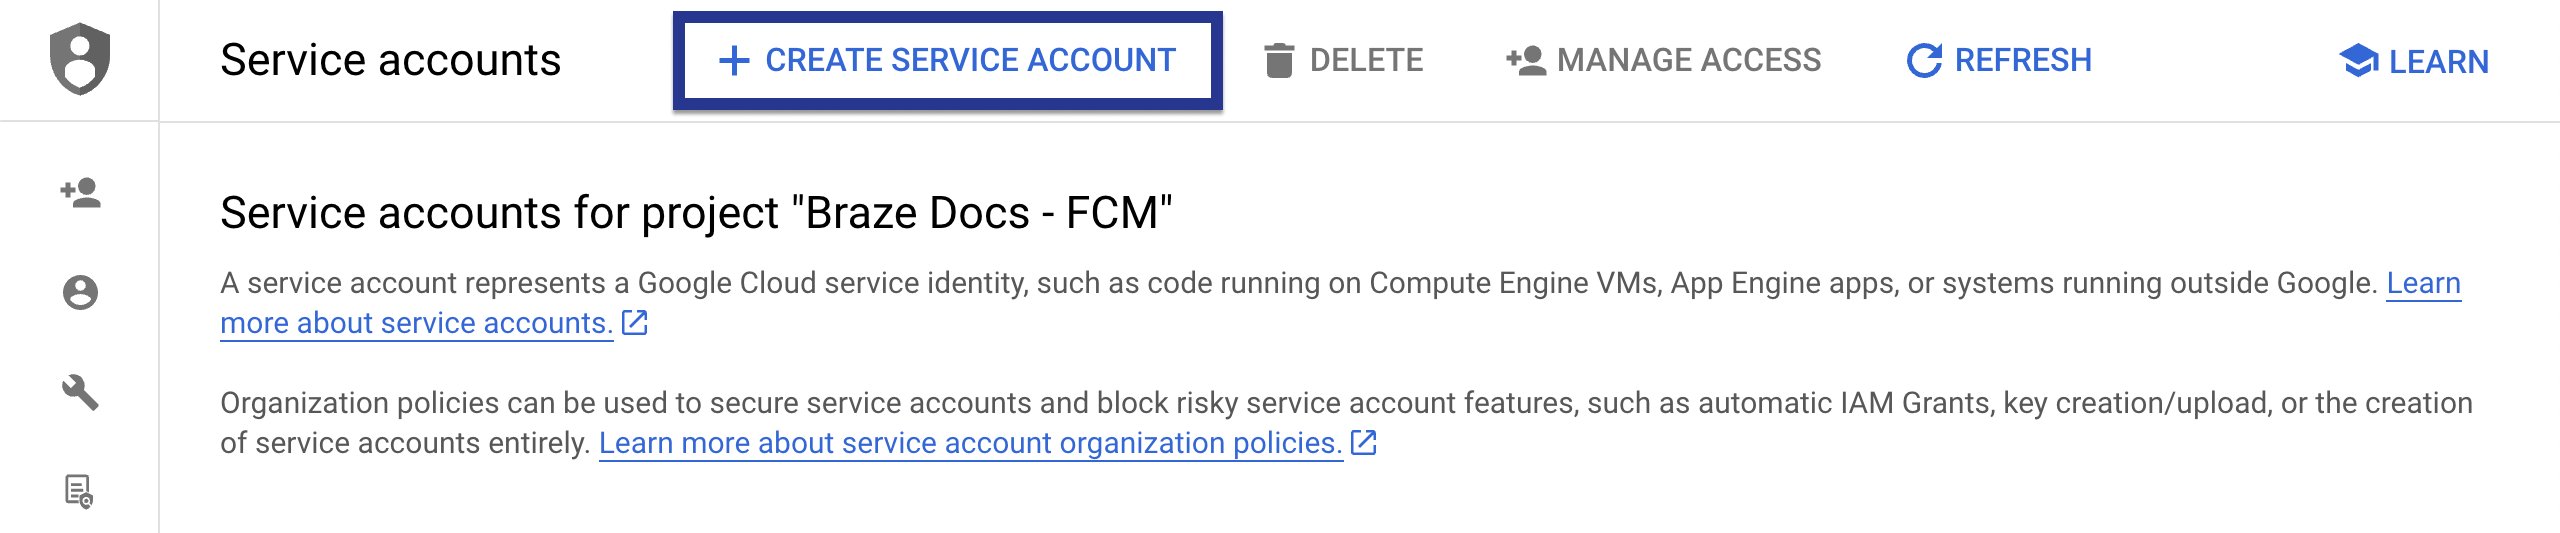
**Google Cloud** > **Service Accounts** 으로 이동하여 프로젝트를 선택한 뒤, **CREATE SERVICE ACCOUNT**를 클릭합니다.
## 3단계: 서비스 계정 만들기
다음으로 Fairy가 FCM 토큰 등록 시 인증된 API 호출을 할 수 있도록 새 서비스 계정을 생성합니다.
**Google Cloud** > **Service Accounts** 으로 이동하여 프로젝트를 선택한 뒤, **CREATE SERVICE ACCOUNT**를 클릭합니다.
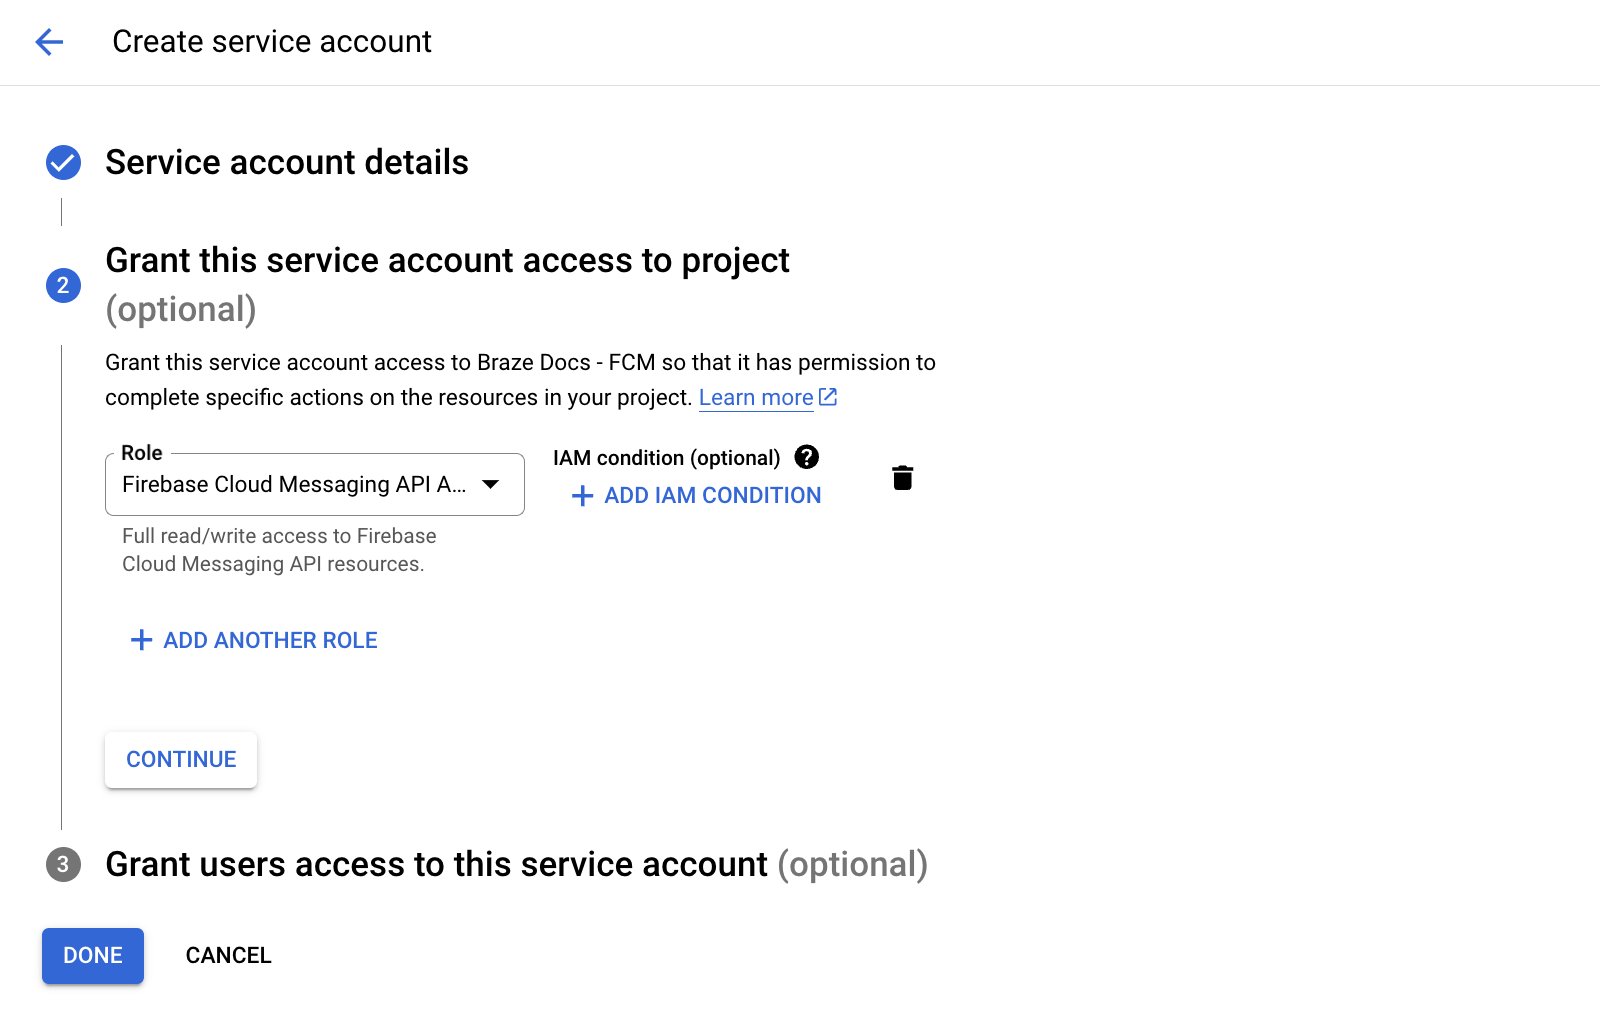
 서비스 계정 이름, ID, 설명을 입력하고 **CREATE AND CONTINUE** 선택하세요.
역할(Role) 필드에서 **Firebase Cloud Messaging API Admin**을 선택하세요.
(더 제한적인 접근 권한이 필요하다면 `cloudmessaging.messages.create` 권한이 있는 [custom role](https://cloud.google.com/iam/docs/creating-custom-roles)을 생성해 선택하세요.)
⚠️주의사항: **Firebase Cloud Messaging Admin**이 아니라 반드시 **Firebase Cloud Messaging API Admin**을 선택해야 합니다.
서비스 계정 이름, ID, 설명을 입력하고 **CREATE AND CONTINUE** 선택하세요.
역할(Role) 필드에서 **Firebase Cloud Messaging API Admin**을 선택하세요.
(더 제한적인 접근 권한이 필요하다면 `cloudmessaging.messages.create` 권한이 있는 [custom role](https://cloud.google.com/iam/docs/creating-custom-roles)을 생성해 선택하세요.)
⚠️주의사항: **Firebase Cloud Messaging Admin**이 아니라 반드시 **Firebase Cloud Messaging API Admin**을 선택해야 합니다.
 ## 4단계: JSON 자격 증명 생성
FCM 서비스 계정을 위한 JSON Credentials를 만듭니다.
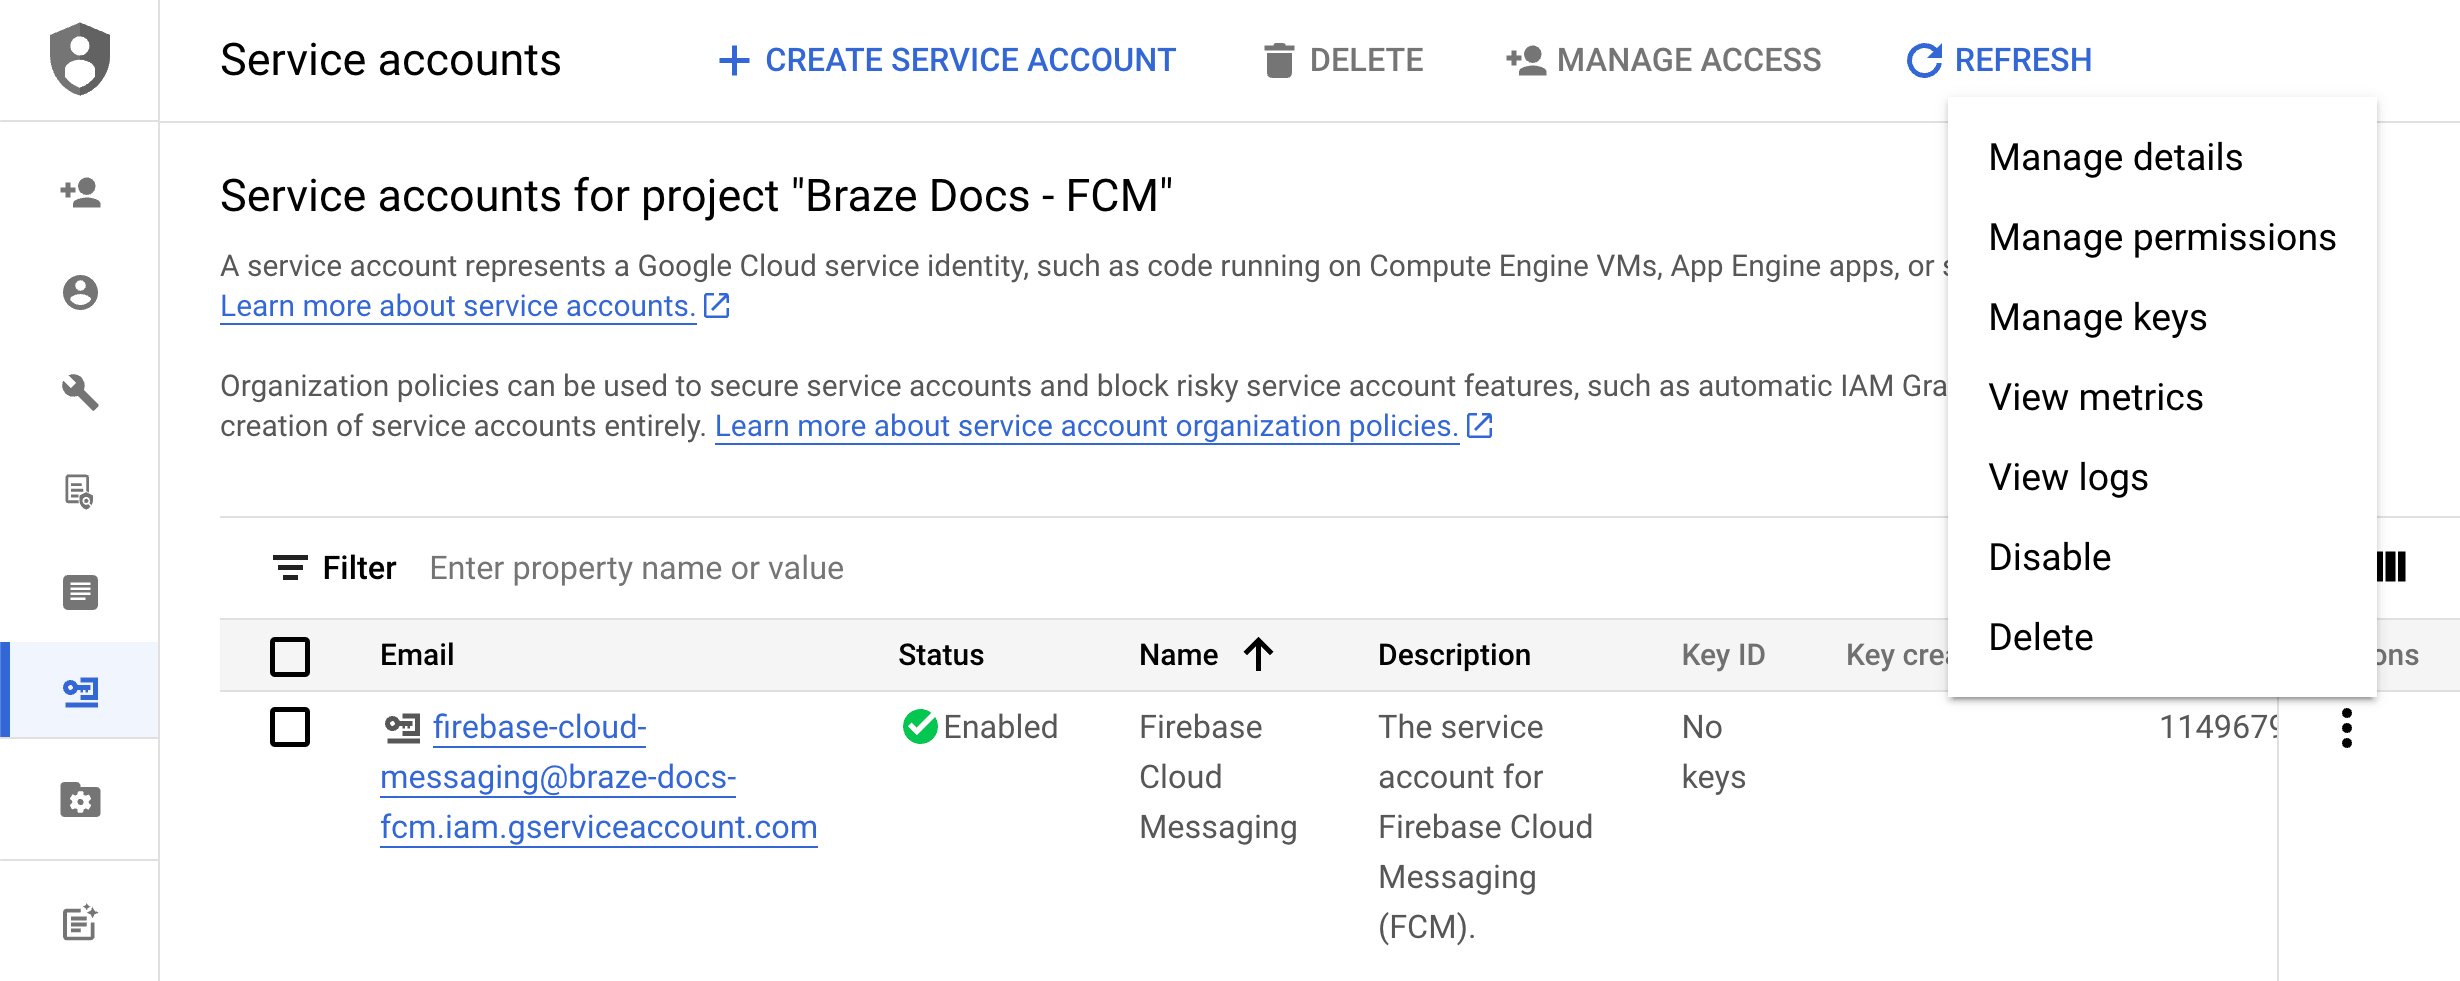
Google Cloud IAM & Admin에서 Service Accounts 을 선택한 뒤, 위에 만든 FCM service account를 찾고, **Actions** > **Manage Keys**로 이동하세요.
## 4단계: JSON 자격 증명 생성
FCM 서비스 계정을 위한 JSON Credentials를 만듭니다.
Google Cloud IAM & Admin에서 Service Accounts 을 선택한 뒤, 위에 만든 FCM service account를 찾고, **Actions** > **Manage Keys**로 이동하세요.
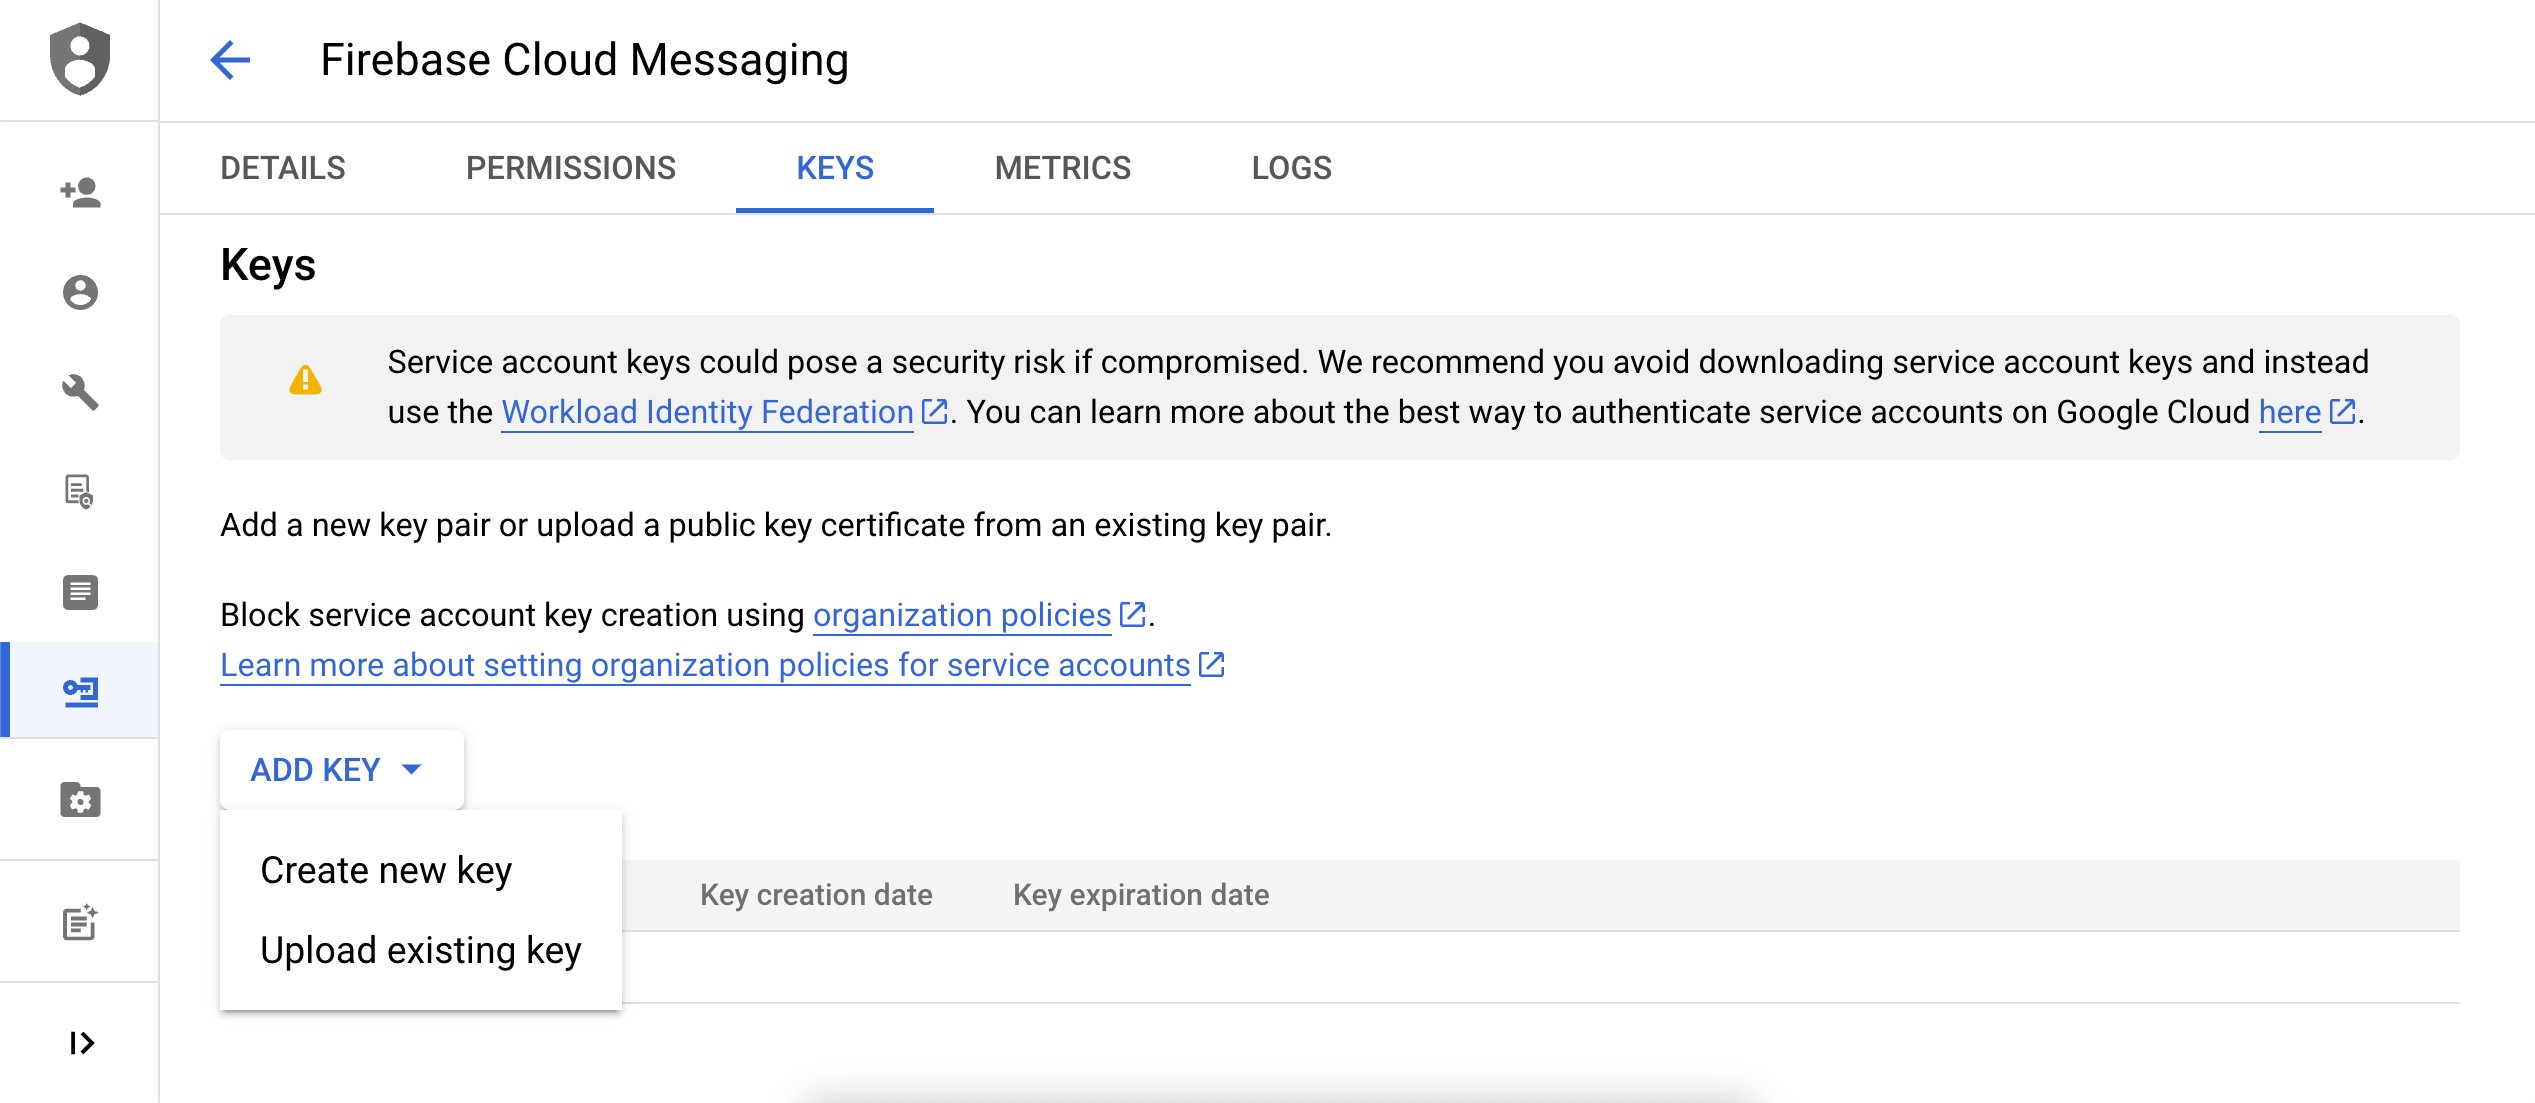
 Add Key > Create new key를 선택합니다.
 **JSON**을 선택한 뒤 **CREATE**를 클릭합니다.
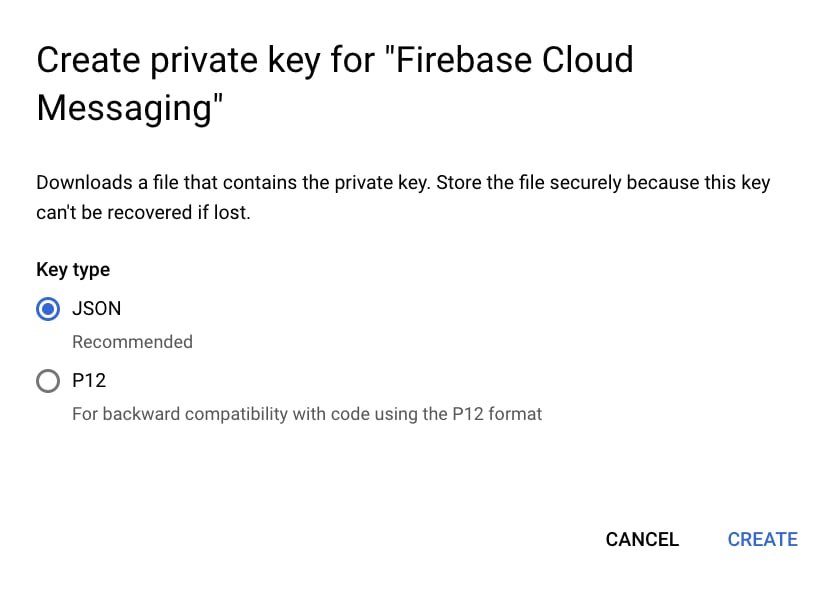 ⚠️ 경고: 다운로드한 JSON 키는 이후 단계에서 필요하므로 안전한 위치에 보관하세요
## 5단계: Fairy에 JSON 전달
필요하신 환경에 맞게 1\~4단계를 반복하신 뒤 JSON 파일을 전달해주세요. (개발용, 운영용)
email: [eng@fairytech.ai](mailto:eng@fairytech.ai)
# 알림 표시하기
## 1. 종속성에 Cloud Messaging 추가하기
build.gradle 에 **Firebase Messaging** 과 **Moment SDK(push 확장)** 를 추가합니다.
```text theme={null}
plugins {
id("com.google.gms.google-services")
}
dependencies {
implementation("com.google.firebase:firebase-messaging:+")
implementation "ai.fairytech:moment-x-push:${LATEST_VERSION}"
}
```
AndroidManifest.xml 에 알림 권한을 추가합니다.
```bash theme={null}
```
## 2. **FirebaseMessagingService 생성/등록**
* FirebaseMessagingService 를 상속받아 **토큰 수신** 및 **메시지 수신**을 처리합니다.
* AndroidManifest.xml 에 해당 서비스를 등록합니다.
```kotlin theme={null}
class CustomFcmService : FirebaseMessagingService() {
override fun onNewToken(token: String) {
}
override fun onMessageReceived(remoteMessage: RemoteMessage) {
}
}
```
```xml theme={null}
```
## 3. MomentSDK 를 FirebaseMessagingService 와 연동하기
* **onNewToken** 과 **onMessageReceived** 에서 Moment SDK API 를 호출해 사용자/디바이스 토큰을 등록하고, 메시지를 위임 처리합니다.
```kotlin theme={null}
import ai.fairytech.moment.MomentSDK
import ai.fairytech.moment.exception.MomentException
import ai.fairytech.moment.MomentPush
class CustomFcmService : FirebaseMessagingService() {
override fun onNewToken(token: String) {
// token 등록
MomentPush.addDeviceToken(token, object: MomentSDK.ResultCallback {
override fun onSuccess() {
}
override fun onFailure() {
Log.w("CustomFcmService", "Failed to set token to moment")
}
})
}
override fun onMessageReceived(remoteMessage: RemoteMessage) {
if (MomentPush.isFairyMessage(message)) {
MomentPush.handleMessage(message)
}
}
}
```
## 4. 유저 등록
```kotlin theme={null}
val momentSDK = MomentSDK.getInstance(context)
// 유저 등록
momentSDK.setUserId(userId, object: MomentSDK.ResultCallback {
override fun onSuccess() {
// user id 설정되면 해당 user 를 push 시스템에 등록
MomentPush.registerUserToPush(object: MomentSDK.ResultCallback {
override fun onSuccess() {
}
override fun onFailure() {
}
})
}
override fun onFailure() {
}
})
```
## 5. 테스트
* Moment Public API 를 사용해 테스트 메시지를 전송합니다.
* projectId 와 api key 를 확인하시고 헤더와 params 로 넣어주세요.
* `x-moment-api-key` 는 sdk-api-key 와 다릅니다. 별도로 전달드린 api-key를 사용해주세요.
```bash theme={null}
curl -X 'POST' \
'' \
-H 'accept: */*' \
-H 'x-moment-api-key: {**YOUR_API_KEY**}' \
-H 'Content-Type: application/json' \
-d '{
"userId": "test-user-id",
"sdkVersion": "1.2.3",
"businessName": "gmarket"
}'
```
⚠️ 경고: 다운로드한 JSON 키는 이후 단계에서 필요하므로 안전한 위치에 보관하세요
## 5단계: Fairy에 JSON 전달
필요하신 환경에 맞게 1\~4단계를 반복하신 뒤 JSON 파일을 전달해주세요. (개발용, 운영용)
email: [eng@fairytech.ai](mailto:eng@fairytech.ai)
# 알림 표시하기
## 1. 종속성에 Cloud Messaging 추가하기
build.gradle 에 **Firebase Messaging** 과 **Moment SDK(push 확장)** 를 추가합니다.
```text theme={null}
plugins {
id("com.google.gms.google-services")
}
dependencies {
implementation("com.google.firebase:firebase-messaging:+")
implementation "ai.fairytech:moment-x-push:${LATEST_VERSION}"
}
```
AndroidManifest.xml 에 알림 권한을 추가합니다.
```bash theme={null}
```
## 2. **FirebaseMessagingService 생성/등록**
* FirebaseMessagingService 를 상속받아 **토큰 수신** 및 **메시지 수신**을 처리합니다.
* AndroidManifest.xml 에 해당 서비스를 등록합니다.
```kotlin theme={null}
class CustomFcmService : FirebaseMessagingService() {
override fun onNewToken(token: String) {
}
override fun onMessageReceived(remoteMessage: RemoteMessage) {
}
}
```
```xml theme={null}
```
## 3. MomentSDK 를 FirebaseMessagingService 와 연동하기
* **onNewToken** 과 **onMessageReceived** 에서 Moment SDK API 를 호출해 사용자/디바이스 토큰을 등록하고, 메시지를 위임 처리합니다.
```kotlin theme={null}
import ai.fairytech.moment.MomentSDK
import ai.fairytech.moment.exception.MomentException
import ai.fairytech.moment.MomentPush
class CustomFcmService : FirebaseMessagingService() {
override fun onNewToken(token: String) {
// token 등록
MomentPush.addDeviceToken(token, object: MomentSDK.ResultCallback {
override fun onSuccess() {
}
override fun onFailure() {
Log.w("CustomFcmService", "Failed to set token to moment")
}
})
}
override fun onMessageReceived(remoteMessage: RemoteMessage) {
if (MomentPush.isFairyMessage(message)) {
MomentPush.handleMessage(message)
}
}
}
```
## 4. 유저 등록
```kotlin theme={null}
val momentSDK = MomentSDK.getInstance(context)
// 유저 등록
momentSDK.setUserId(userId, object: MomentSDK.ResultCallback {
override fun onSuccess() {
// user id 설정되면 해당 user 를 push 시스템에 등록
MomentPush.registerUserToPush(object: MomentSDK.ResultCallback {
override fun onSuccess() {
}
override fun onFailure() {
}
})
}
override fun onFailure() {
}
})
```
## 5. 테스트
* Moment Public API 를 사용해 테스트 메시지를 전송합니다.
* projectId 와 api key 를 확인하시고 헤더와 params 로 넣어주세요.
* `x-moment-api-key` 는 sdk-api-key 와 다릅니다. 별도로 전달드린 api-key를 사용해주세요.
```bash theme={null}
curl -X 'POST' \
'' \
-H 'accept: */*' \
-H 'x-moment-api-key: {**YOUR_API_KEY**}' \
-H 'Content-Type: application/json' \
-d '{
"userId": "test-user-id",
"sdkVersion": "1.2.3",
"businessName": "gmarket"
}'
```